
Lesson 3 of 5 · The VWAP Wave System, explained
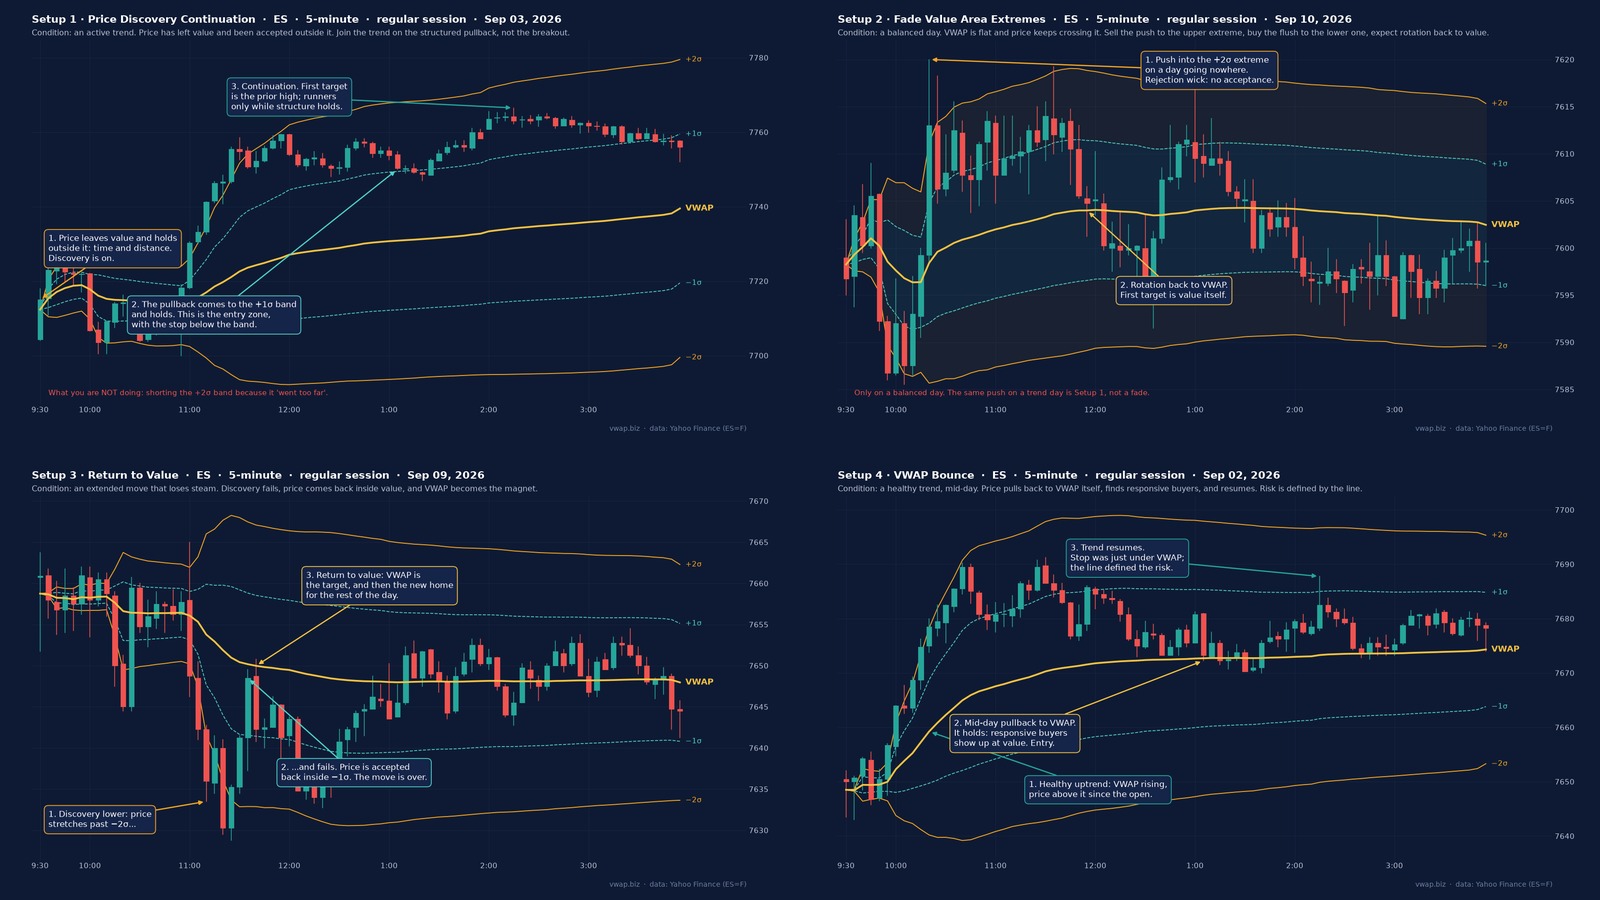
A map is useless without a plan. Lessons 1 and 2 gave you the VWAP anchor and the band map. This lesson is what the VWAP Wave System actually trades: four core setups, each matched to a specific market condition. I’ll show you each one on a real ES session from the last two weeks, because I learned them from charts, not from definitions.
Here’s the part I got wrong for years and the part my group still catches each other on. Beginners find one setup that worked once and force it into every session. The system does the opposite: read the condition first, then deploy the setup that fits it. The setups below are tactics. The condition decides which tactic is allowed.
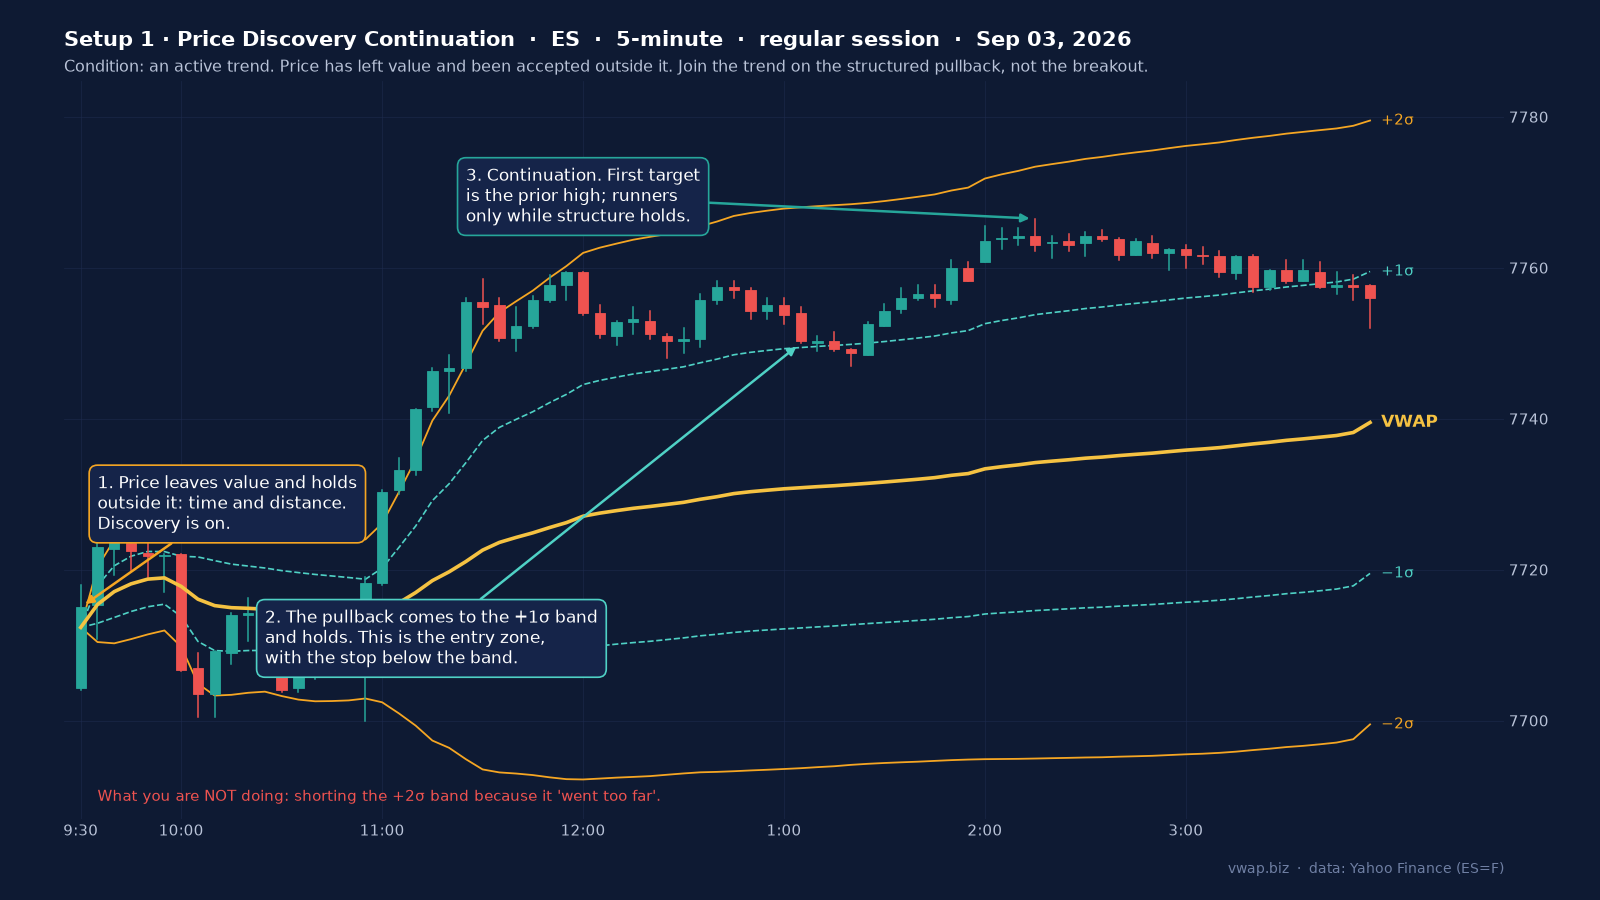
Setup 1: Price Discovery Continuation
Condition: an active trend. The market has left its old value area and is searching for new prices, what auction theory calls price discovery. The beginner error here is the one I made on every trend day of 2024: “it’s gone too far, I’ll fade it.” This setup does the opposite. It joins the trend on the structured pullback, with the institutions driving the auction rather than against them.
Setup 2: Fade Value Area Extremes
Condition: a balanced, sideways day. Price is ping-ponging inside the bands and going nowhere, VWAP is flat, and the highest-probability trade is fading the extremes: selling pushes to the upper band, buying flushes to the lower one, expecting rotation back toward value. Chop drives trend traders mad. A VWAP Wave trader treats it as a defined-edge environment, and after a year I’d rather trade a clean balanced day than a messy trend.

Setup 3: Return to Value
Condition: an extended move losing steam. After a discovery phase, markets very often come back to a value area, either the new one they built or the prior day’s. This setup captures the gravitational snap back toward VWAP or established value. It’s the statistical heart of the system, stretched prices tend to revert, and it’s the setup that finally made the bands make sense to me.

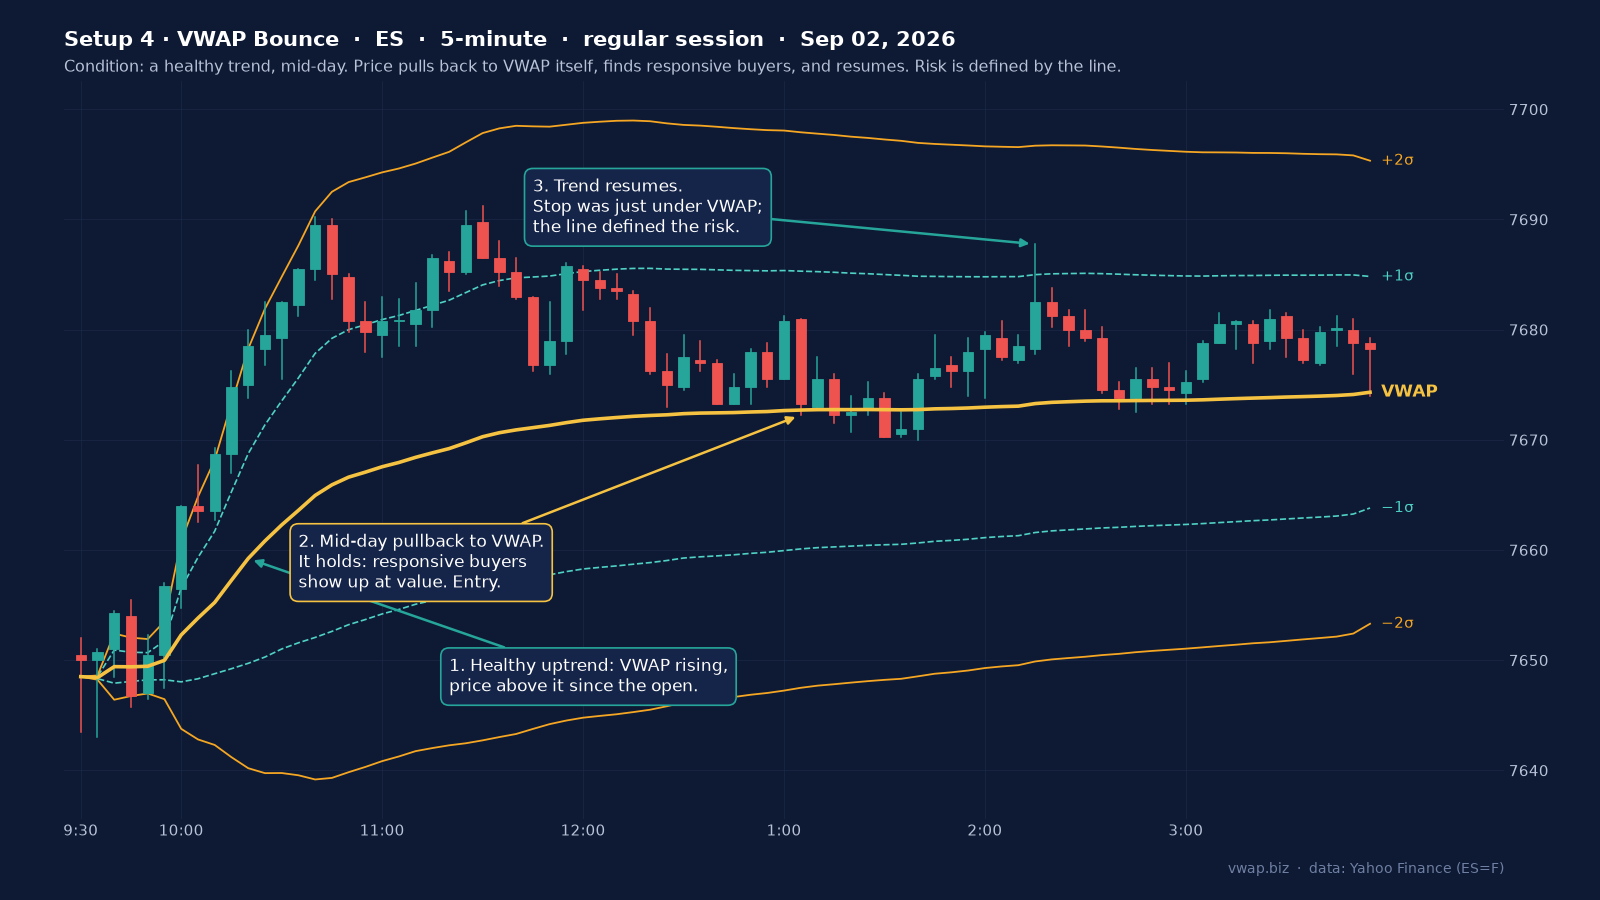
Setup 4: VWAP Bounce
Condition: a healthy trend, mid-day. In a trending market VWAP itself becomes the pullback zone: price comes back to the line, finds responsive buyers, or sellers in a downtrend, and resumes. A clean mid-trend pullback to VWAP is the most repeatable, beginner-friendly entry in the whole framework, because the risk is defined by the line. It’s the first setup I let new members of my group trade live.
The common thread
Notice what the four share: none of them are predictions. Each one is a response to what the market is already showing you: trend, balance, exhaustion, or pullback. That’s the discretionary edge in Chris’s subtitle. Structure and context first, entry second. It’s also why my journal has a column for the condition before it has a column for the setup.
What’s next
Four setups, two conditions. So how do you know which condition you’re in? That’s the skill that separates system traders from setup collectors, and it’s the lesson I’d have paid the most for ten years ago.
Next lesson, Lesson 4: Context is king, balance, discovery, and the clock.
Each setup has precise entry criteria, stop placement, and target logic in the full system, including the trade checklist used before every entry. That’s Chris’s material: start with the free Core Setup Guide, then the book.
Disclosure. VWAP.biz is an independent site written by Scott West, a paying member of Drysdale Trading Group. The VWAP Wave System™ is Chris Drysdale’s work, and this site is not affiliated with or endorsed by him. Links to his book, toolkit, and community are affiliate links: if you buy through them I may earn a commission at no extra cost to you. Nothing here is financial advice, and trading futures carries a risk of loss. Full disclosure · Risk disclaimer
Ready for the system itself, not just my lessons on it?
I explain the VWAP Wave System from a student’s chair. Chris Drysdale teaches it. Start with his free Core Setup Guide, read the book, or take seven days inside Drysdale Trading Group and watch it traded live.